In this tutorial we learn How to encode and decode json on NodeMCU using Arduino IDE? we will be using the ArduinoJson library for the ESP8266 to help us parse JSON data and extract values based on keys. The ArduinoJson library is also capable of serializing JSON, meaning you could generate your own JSON data using data from sensors connected to your ESP8266 or Arduino.

Introduction
JSON (JavaScript Object Notation) is a lightweight data-interchange format. It is easy for humans to read and write. It is easy for machines to parse and generate. It is based on a subset of the JavaScript Programming Language, Standard ECMA-262 3rd Edition – December 1999. JSON is a text format that is completely language independent but uses conventions that are familiar to programmers of the C-family of languages, including C, C++, C#, Java, JavaScript, Perl, Python, and many others. These properties make JSON an ideal data-interchange language.
[ref https://www.json.org/]
JSON is built on two structures:
- A collection of name/value pairs. In various languages, this is realized as an object, record, struct, dictionary, hash table, keyed list, or associative array.
- An ordered list of values. In most languages, this is realized as an array, vector, list, or sequence.
These are universal data structures. Virtually all modern programming languages support them in one form or another. It makes sense that a data format that is interchangeable with programming languages also be based on these structures.
Example : { “name”:“John”, “age”:31, “city”:“New York” }
In JSON, they take on these forms:
Object
An object is an unordered set of name/value pairs. An object begins with { (left brace) and ends with } (right brace). Each name is followed by : (colon) and the name/value pairs are separated by , (comma).

Example: myJSON = ‘{“name”:”John”, “age”:31, “city”:”New York”}’;
Array
An array is an ordered collection of values. An array begins with [ (left bracket) and ends with ] (right bracket). Values are separated by , (comma).

Example: myJSON = ‘{“data”: [100,20,34,120], “name”:”Voltage”}
Value
A value can be a string in double quotes, or a number, or true or false or null, or an object or an array. These structures can be nested.

Example: myJSON = ‘{“Name”:“circuits”, “Data”: 45, “DataSet”:[3,4,56,2,2,56], “check”:true}’
String
A string is a sequence of zero or more Unicode characters, wrapped in double quotes, using backslash escapes. A character is represented as a single character string. A string is very much like a C or Java string.

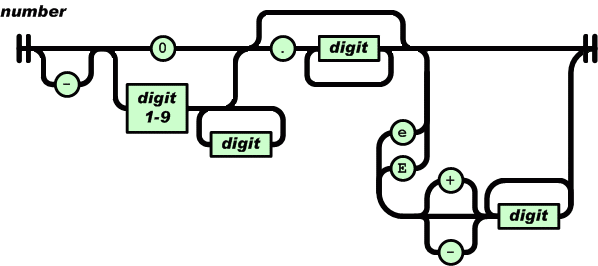
Number
A number is very much like a C or Java number, except that the octal and hexadecimal formats are not used.
White space can be inserted between any pair of tokens.
NodeMCU JSON Decode Example Arduino IDE Code
For this program ArduinoJSON library is required. Go to
Sketch>>Include Library>>Manage Libraries..

Then search for JSON and Install library Arduinojson by Benoit Blanchon.

Before you can use the ArduinoJson library, you have to make sure the library is installed on your computer. To do a quick check, head over to the library manager in the Arduino IDE (Sketch -> Include Library -> Manage Libraries…) and type “ArduinoJson” in the text box, if you see a green coloured “INSTALLED” label beside the name of the library, that means you are all good to go and you can proceed on to the next step. If you don’t see the label, click on the box/division once and you will see the “Install” button. Hit install and you are all set for the next step.
Arduino JSON Decode Example:
This program makes NodeMCU as a client to send http request to web server (similar to your web browser) and gets JSON response from it and decodes it. In program change wifi-name and wifi-password as per your wifi router configuration.
/*
 *  ESP8266 JSON Decode of server response
 *  -Manoj R. Thkuar
 *  https://circuits4you.com
 */

#include <ESP8266WiFi.h>
#include <WiFiClient.h>
#include <ESP8266HTTPClient.h>
#include <ArduinoJson.h>

const char* wifiName = "wifi-name";
const char* wifiPass = "wifi-password";

//Web Server address to read/write from
const char *host = "http://arduinojson.org/example.json";

void setup() {

  Serial.begin(115200);
  delay(10);
  Serial.println();

  Serial.print("Connecting to ");
  Serial.println(wifiName);

  WiFi.begin(wifiName, wifiPass);

  while (WiFi.status() != WL_CONNECTED) {
    delay(500);
    Serial.print(".");
  }

  Serial.println("");
  Serial.println("WiFi connected");
  Serial.println("IP address: ");
  Serial.println(WiFi.localIP());   //You can get IP address assigned to ESP
}

void loop() {
  HTTPClient http;    //Declare object of class HTTPClient

  Serial.print("Request Link:");
  Serial.println(host);

  http.begin(host);     //Specify request destination

  int httpCode = http.GET();            //Send the request
  String payload = http.getString();    //Get the response payload from server

  Serial.print("Response Code:"); //200 is OK
  Serial.println(httpCode);   //Print HTTP return code

  Serial.print("Returned data from Server:");
  Serial.println(payload);    //Print request response payload

  if(httpCode == 200)
  {
    // Allocate JsonBuffer
    // Use arduinojson.org/assistant to compute the capacity.
    const size_t capacity = JSON_OBJECT_SIZE(3) + JSON_ARRAY_SIZE(2) + 60;
    DynamicJsonBuffer jsonBuffer(capacity);

   // Parse JSON object
    JsonObject& root = jsonBuffer.parseObject(payload);
    if (!root.success()) {
      Serial.println(F("Parsing failed!"));
      return;
    }

    // Decode JSON/Extract values
    Serial.println(F("Response:"));
    Serial.println(root["sensor"].as<char*>());
    Serial.println(root["time"].as<char*>());
    Serial.println(root["data"][0].as<char*>());
    Serial.println(root["data"][1].as<char*>());
  }
  else
  {
    Serial.println("Error in response");
  }

  http.end();  //Close connection

  delay(5000);  //GET Data at every 5 seconds
}
Results
Open serial monitor and observe the response. Try same link (http://arduinojson.org/example.json) in web browser it should return JSON response same as we are getting in ESP serial monitor.

NodeMCU JSON Encode Example
In program change wifi-name and wifi-password as per your wifi router configuration. This example shows how to encode analog and digital value with example of ADC and Flash button.
Example Encoded JSON: {“ADC”:0,”KEY”:0}
/*
 *  ESP8266 JSON Encode Server
 *  -Manoj R. Thkuar
 *  https://circuits4you.com
 */

#include <ESP8266WiFi.h>
#include <ESP8266WebServer.h>
#include <ESP8266mDNS.h>
#include <ArduinoJson.h>

const char* wifiName = "wifi-name";
const char* wifiPass = "wifi-password";

ESP8266WebServer server(80);  //Define server object

//Handles http request
void handleRoot() {
  String webPage;

  // Allocate JsonBuffer
  // Use arduinojson.org/assistant to compute the capacity.
  StaticJsonBuffer<500> jsonBuffer;

  // Create the root object
  JsonObject& root = jsonBuffer.createObject();

  root["ADC"] = analogRead(A0); //Put Sensor value
  root["KEY"] = digitalRead(0); //Reads Flash Button Status

  root.printTo(webPage);  //Store JSON in String variable
  server.send(200, "text/html", webPage);
}

// the setup function runs once when you press reset or power the board
void setup() {

  Serial.begin(115200);
  delay(10);
  Serial.println();

  Serial.print("Connecting");

  WiFi.begin(wifiName, wifiPass);   //Connect to WiFi

  while (WiFi.status() != WL_CONNECTED) {
    delay(500);
    Serial.print(".");
  }

  Serial.println("");
  Serial.println("WiFi connected");
  Serial.println("IP address: ");
  Serial.println(WiFi.localIP());   //You can get IP address assigned to ESP

  server.on("/", handleRoot);      //Associate handler function to web requests

  server.begin(); //Start web server
  Serial.println("HTTP server started");
}

void loop() {
  //Handle Clinet requests
  server.handleClient();
}
Results
After uploading get IP of NodeMCU from Serial monitor. Open web browser and enter IP. Press flash button and refresh webpage to see updated values in JSON.

References:
To get more information on all types of web and communication protocols used with Node MCU, Read my eBook NodeMCU: Communication methods and protocols.
Hi! I’m getting this error! DynamicJsonBuffer is a class from ArduinoJson 5. Please see arduinojson.org/upgrade to learn how to upgrade your program to ArduinoJson version 6.
Hi, Got your book and it’s really brilliant – would recommend to anyone.
I am struggling with JSON decode of server response, json library has been updated to v6.11.0 and the code does not work. Could you post the alterations I need to make to get this working please.